
 Learn How to Replace the Sky in Photoshop
In this Photoshop tutorial we’ll learn how to replace the sky in
Photoshop. When we capture photos, usually something is not looking good
inside the picture. Very often the sky is underexposed or overexposed.
Sometimes it may be dull or boring. With this easy technique you can
replace any sky in minutes.Tutorial Details and Resources
Difficulty: BeginnerApps: Adobe Photoshop (CS or later)
Estimated Completion Time: 5-10′ Minutes
Resources: City Hall by William – Sky by zaphad1
Step 1 > Quick Selection
Pick the Magic Wand Tool (M) with 20 Tolerance and make a selection of the sky you want to replace. You can use your favorite selection method but Magic Wand Tool is quick and easy for images like this.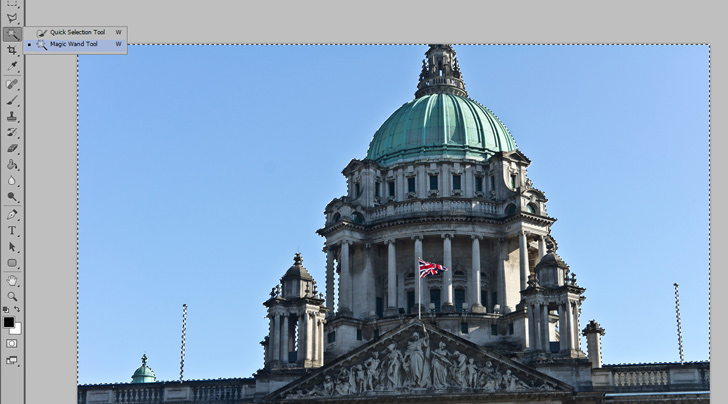
Step 2 > Copy the Sky
Open the new sky image in new Photoshop document and quickly select the sky. Go to Edit > Copy or press (Ctrl + C) on your keyboard to copy the sky.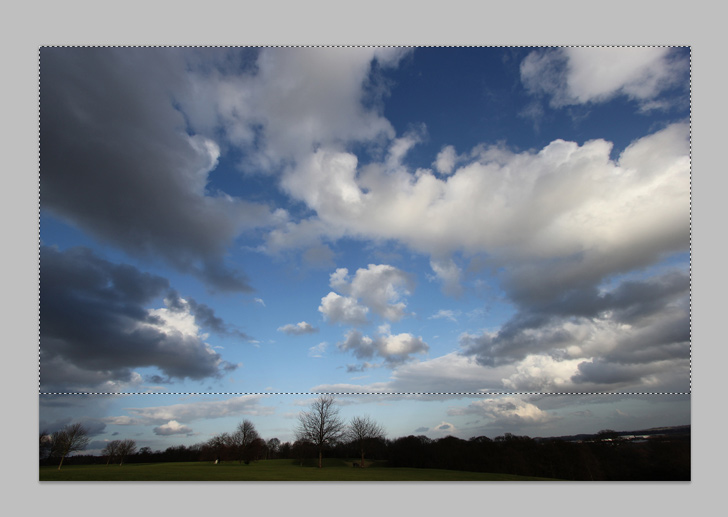
Step 3 > Replace the Sky
With the City Hall image active go to Edit > Paste Special > Paste Info to replace the sky. Scale the new sky if needed.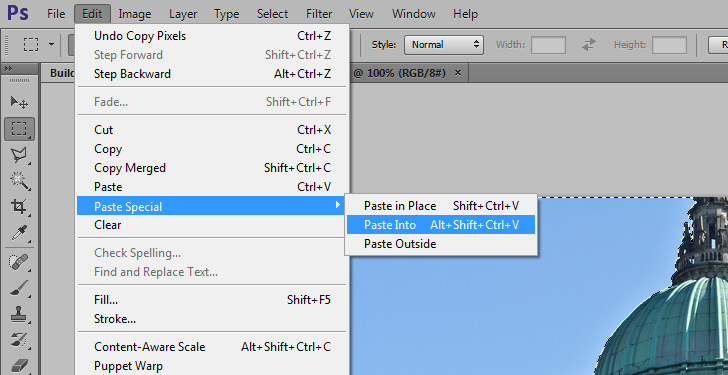
Step 3 > Brightness
If the new sky is darker from the original go to Image > Adjustments > Brightness/Contrast and increase the brightness until you like the result. Repeat the same technique if the sky have different color toning but this time change color balance or hue/saturation. For this image i increased only the brightness by 50.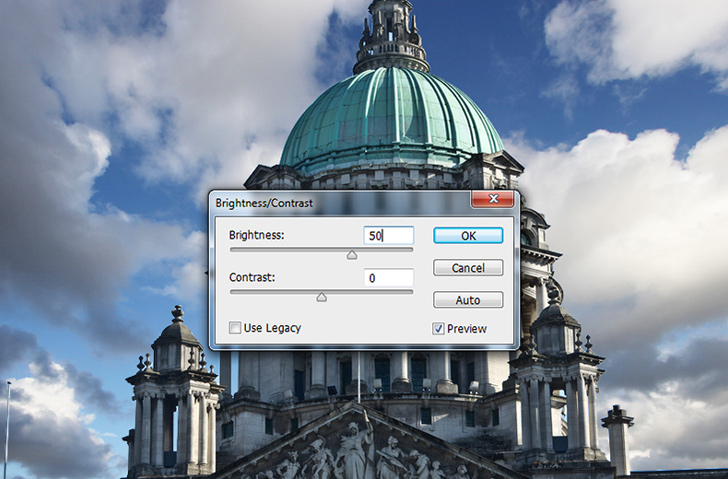
Conclusion
When you want to replace the sky try to find a similar image. Images shot in different weather conditions have different white balance. You have to change the brightness and color toning.
Final Image


0 comments:
Post a Comment